Firmware Selection and Flashing
This guide covers ImmortalWrt image selection, SD card flashing, and first-boot verification.
Acceptance result: after the Pi has booted for 2–5 minutes, the computer can open
http://192.168.1.1.
Pre-flash checks
- The device is a Raspberry Pi 4B, 400, or CM4.
- The firmware target is
bcm27xx / bcm2711. - Existing data on the SD card has been backed up.
Writing an .img or .img.gz replaces the partition table on the card. Verify the target disk by device name and capacity before writing.
Download the correct image
Search for the device in the ImmortalWrt Firmware Selector, or use a project Release explicitly labeled for Raspberry Pi 4B / 400 / CM4.
A first-install disk image commonly ends in .img.gz. Do not download .apk or .ipk package files, and do not mistake a checksum for a firmware image.

EXT4 and SQUASHFS
| Filesystem | Characteristics | Recommendation |
|---|---|---|
| SQUASHFS | Read-only system layer plus writable overlay; supports factory reset | Preferred for a first installation |
| EXT4 | Directly writable root filesystem; more familiar offline partition resizing | Choose when you have a specific EXT4 requirement |
Writing a fresh disk image overwrites the target card for both types. Configuration retention depends on the backup and upgrade workflow; SQUASHFS does not mean a fresh image automatically preserves old settings.
Recommended method: balenaEtcher
balenaEtcher runs on Windows, macOS, and Linux and normally reads .img.gz directly.
- Install it from the balenaEtcher website.
- Select Flash from file and choose the downloaded image.
- Select the SD card as the target.
- Confirm the target by capacity and device name.
- Start flashing and wait for both writing and verification.
- Safely eject the card.
If Etcher cannot read the compressed image, extract .gz to .img and retry.
Windows notes
Windows may ask to format a partition or say that the drive is inaccessible after flashing. Cancel the prompt. Windows normally cannot read the Linux partitions in the image.
The older Win32 Disk Imager interface looks like this:
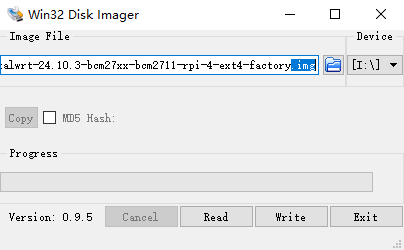
When using that tool:
- select the extracted
.img, not.gz - confirm that the drive letter belongs to the SD card
- click Write, not Read
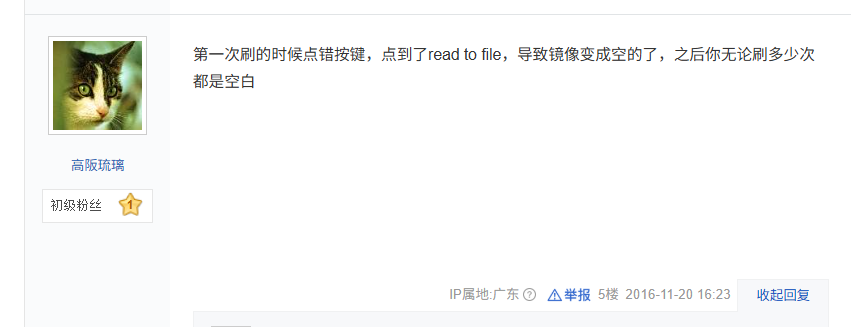
Clicking Read copies the card into the image file. Extract a clean image again and use Write.
macOS: recommended and command-line methods
Prefer balenaEtcher. Use dd only when you understand macOS disk device names.
1. Identify the SD card
Run this before and after inserting the card:
diskutil list
Identify the new disk by capacity, such as /dev/disk6. Do not copy the example number.
2. Unmount it
diskutil unmountDisk /dev/disk6
3. Write the extracted image
sudo dd if=/full/path/immortalwrt.img of=/dev/rdisk6 bs=4m
sync
ifis the imageofis the whole SD card, not one partition/dev/rdiskNis normally faster than/dev/diskN- press
Control + Tto ask macOSddfor status

4. Eject it
diskutil eject /dev/disk6
First boot
- Insert the card while the Pi is powered off.
- Connect Ethernet; wired access is easier for first-boot troubleshooting.
- Power on and wait 2–5 minutes.
- Open
http://192.168.1.1.
Wireless defaults can differ between images. A missing SSID is not enough to conclude that flashing failed; test Ethernet first.
Verification
- The flashing tool completed writing and verification
- You did not accept the Windows format prompt
- The activity LED shows card access after power-on
- LuCI opens or the computer receives a network address from the Pi
Continue with first login in the quick start.
Common failures
| Symptom | Check first |
|---|---|
| The flashing tool cannot find the image | Confirm .img.gz; extract to .img if necessary |
| The card looks empty in Windows | Linux partitions are not normally readable; do not reformat |
| No card activity on the Pi | Power, card contact, and device-target match |
192.168.1.1 does not open | Wait for first boot, keep one computer network active, check address conflicts |
macOS dd reports busy or permission errors | Run unmountDisk and target the whole disk |