Upstream Router LAN Connection
Use this path when an existing router already handles the internet connection. The Pi connects to it over Ethernet, while phones and computers join Pi Wi-Fi and pass through the Pi for OpenClash routing.
Acceptance result: Pi
WANautomatically receives an upstream address; Pi Wi-Fi clients receive a separate LAN address and can access the internet.
Network topology
Internet
  │
Upstream router (example: 192.168.1.1)
  │ LAN port
  │
Pi eth0 → WAN (DHCP client, receives 192.168.1.x)
Pi Wi-Fi → LAN / br-lan (example: 192.168.8.1)
  │
Phones and computers (receive 192.168.8.x)
This creates a second routed network, but keeps WAN and LAN roles explicit, makes troubleshooting predictable, and ensures Wi-Fi client traffic passes through the Pi.
Older guides often place Pi LAN directly in the upstream subnet while leaving two DHCP servers active on the same layer-2 network. That can randomly change client addresses, gateways, and DNS. This guide does not recommend that design.
Pre-change checks
- Leave OpenClash disabled for now.
- Confirm that LuCI still opens.
- Generate a configuration archive under
System -> Backup / Flash Firmware. - Record the upstream LAN subnet, such as
192.168.1.0/24.
Pi LAN must use a different subnet. This guide uses 192.168.8.0/24; choose another private subnet if the upstream router already uses it.
Step 1: Prepare Pi Wi-Fi
Go to Network -> Wireless:
- Enable a wireless network.
- Select Access Point mode.
- Set the SSID and WPA2/WPA3 password.
- Bind
Networkonly tolan, notwan.
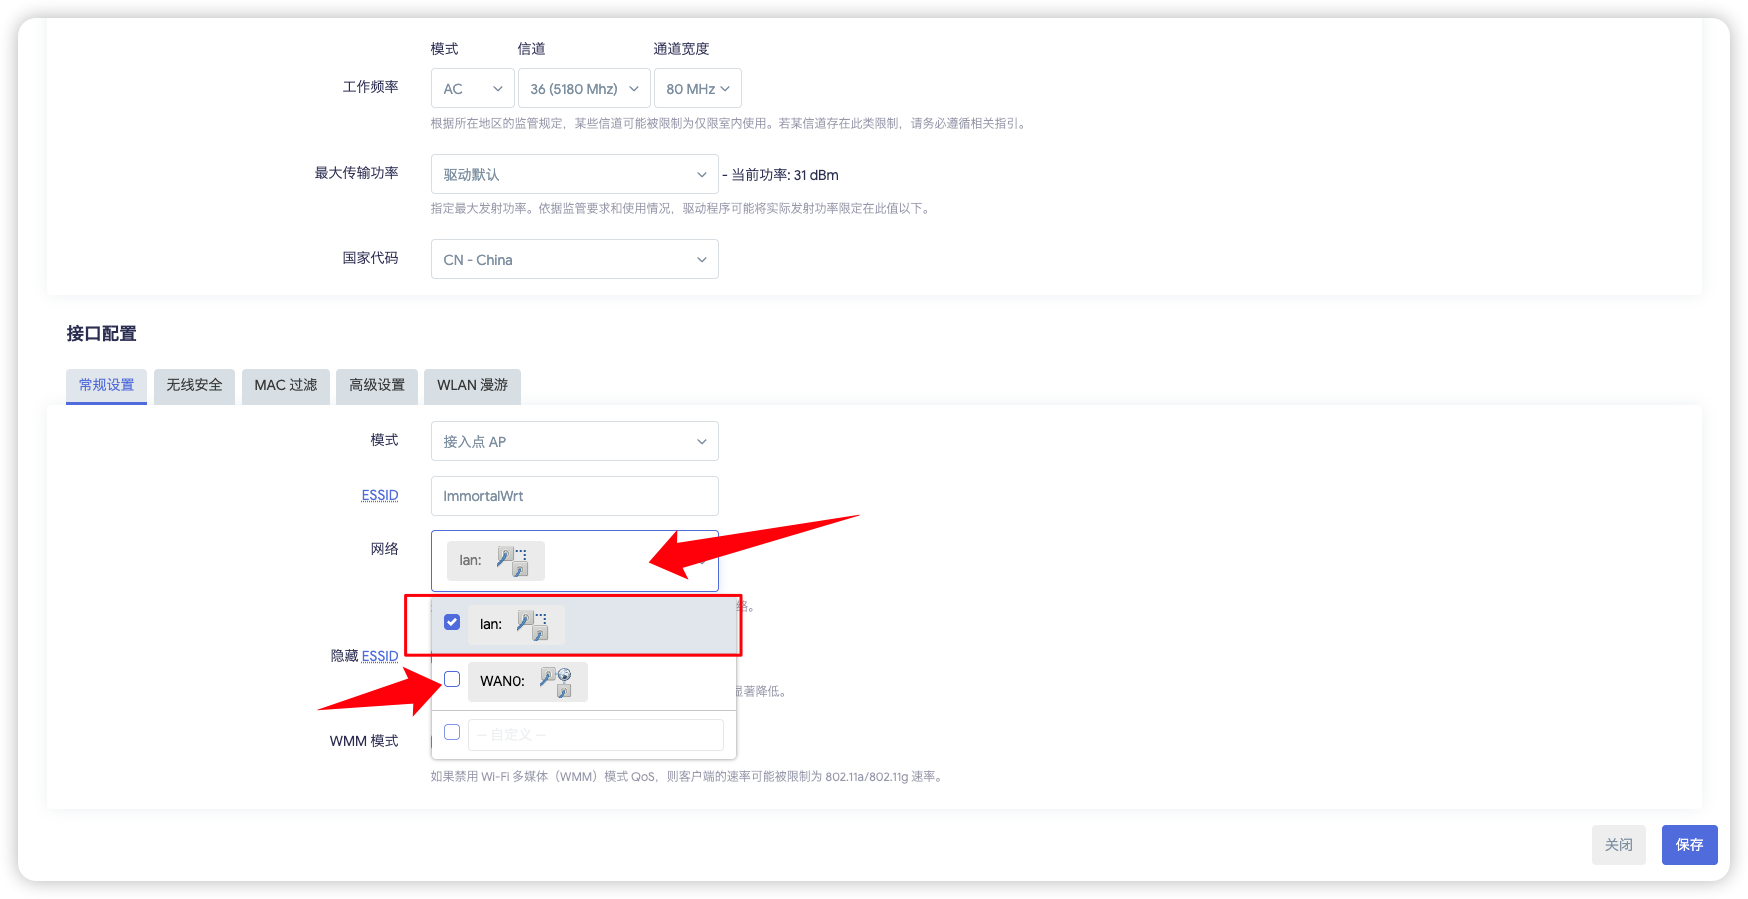
Confirm that the computer can join this Wi-Fi. The next steps move physical port eth0 from LAN to WAN, so the current wired management connection will drop.
Step 2: Give LAN a separate subnet
Open Network -> Interfaces -> LAN -> Edit:
| Field | Example |
|---|---|
| Protocol | Static address |
| Device | br-lan |
| IPv4 address | 192.168.8.1 |
| IPv4 netmask | 255.255.255.0 |
| IPv4 gateway | Empty |
| Custom DNS | Empty |
| Firewall zone | lan |
Keep the LAN DHCP server enabled. The common start value 100 and limit 150 are fine.
After Save & Apply, the old 192.168.1.1 address stops working:
- Join Pi Wi-Fi.
- Disconnect and reconnect once to renew the client address.
- Open
http://192.168.8.1.
If it does not open, first confirm that the computer received a 192.168.8.x address. Do not change WAN yet.
Step 3: Remove eth0 from br-lan
Go to Network -> Interfaces -> Devices, find br-lan, and configure it:
- Remove
eth0from Bridge ports. - Keep the
br-landevice. - Enable
Bring up empty bridgewhen the option is available.
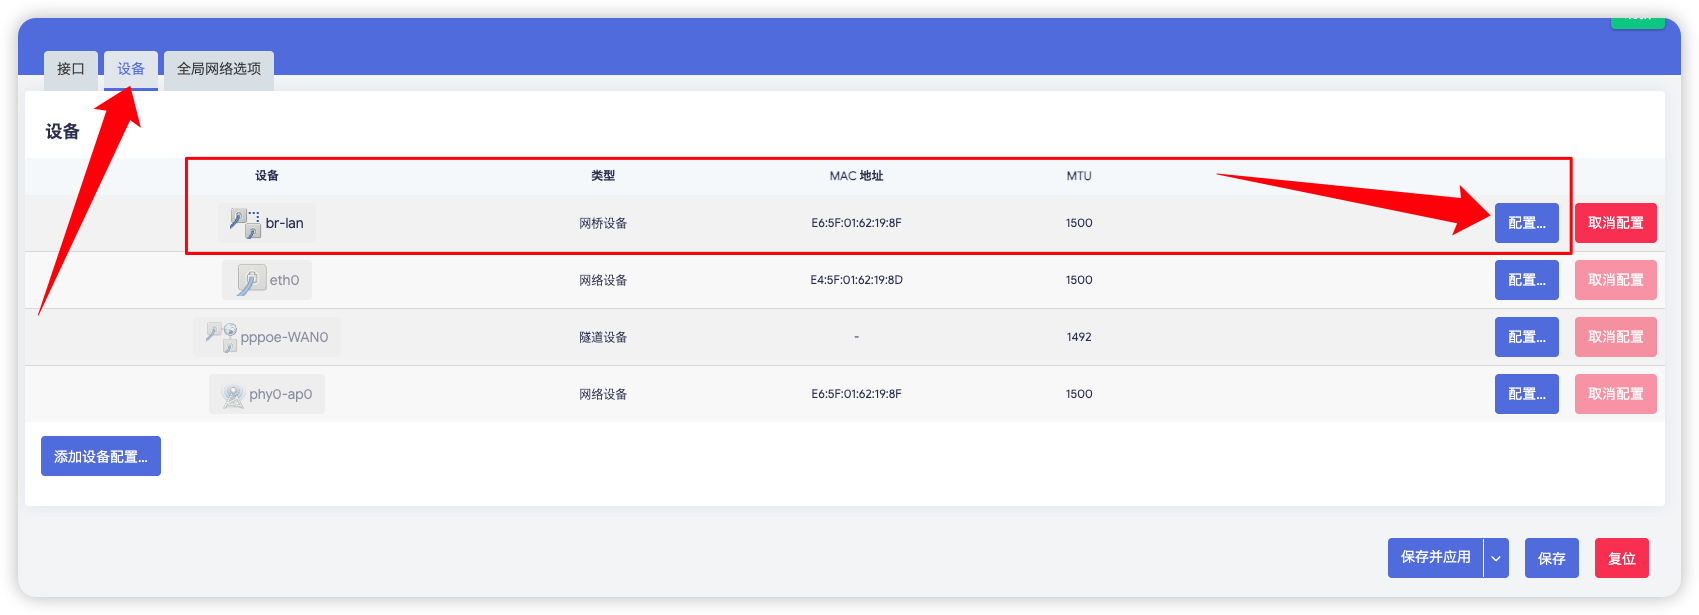
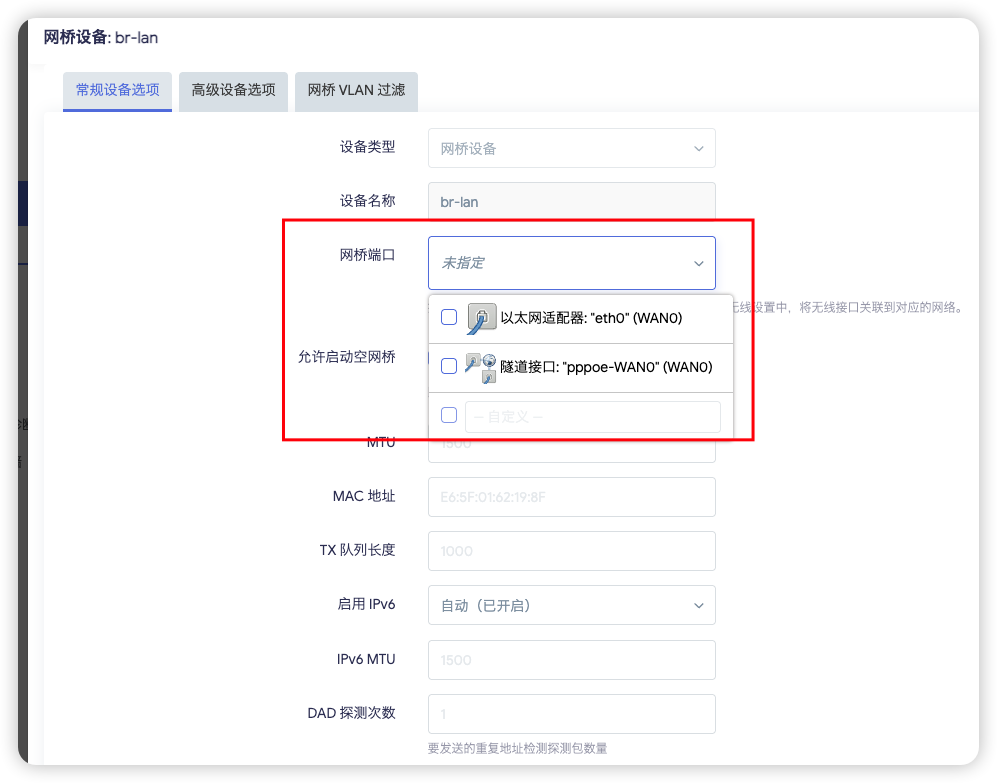
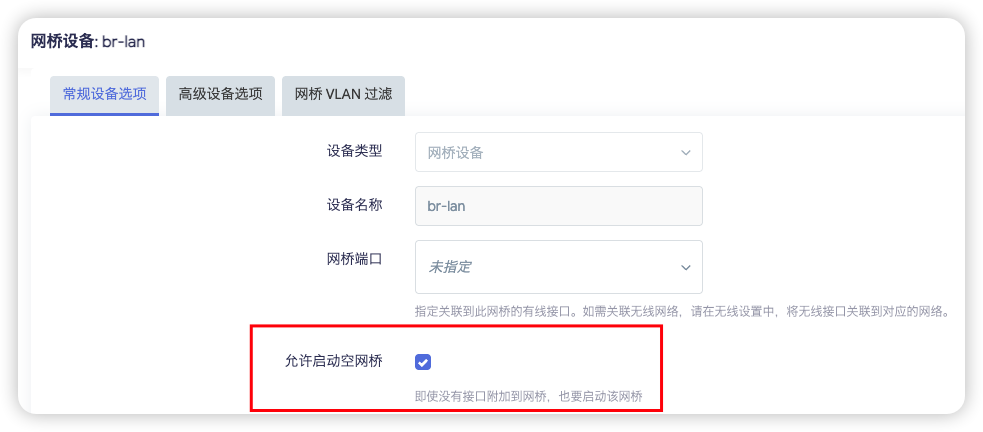
Wireless APs attached to lan are carried by br-lan even without a wired bridge port. Do not leave eth0 in br-lan while also using it for WAN.
Step 4: Create WAN
Open Network -> Interfaces -> Add new interface:
| Field | Value |
|---|---|
| Name | WAN |
| Protocol | DHCP client |
| Device | eth0 |
| Firewall zone | wan |
Save and apply, then connect Pi Ethernet to a LAN port on the upstream router.
WAN should automatically receive an upstream address such as 192.168.1.23, along with a default gateway and DNS.
Step 5: Confirm firewall direction
Under Network -> Firewall, confirm:
- the
lanzone contains LAN - the
wanzone contains WAN lan -> wanforwarding is allowed- masquerading is enabled for
wan
Do not allow unrestricted wan -> lan forwarding.
Step 6: Verify in order
On the Pi
ip addr show dev eth0
ip route show
ping -c 3 1.1.1.1
nslookup openwrt.org
On a client
After joining Pi Wi-Fi, confirm that:
- the client address is
192.168.8.x - gateway and DNS point to
192.168.8.1 http://192.168.8.1opens- a regular website opens
Only after all four pass is the base network complete. Return to the quick start package-manager check.
Common problems
WAN receives no address
Check in this order:
- Ethernet connects to an upstream LAN port
- Upstream DHCP is enabled
- WAN uses
eth0 eth0is no longer inbr-lan
The Pi is online but Wi-Fi clients are not
Check:
- LAN DHCP is enabled
- wireless is attached to
lan - WAN belongs to the
wanfirewall zone lan -> wanforwarding is allowed- WAN masquerading is enabled
Raw IP works but domains fail
This is a DNS problem. Do not redesign LAN and WAN. Check received DNS and test:
cat /tmp/resolv.conf.d/resolv.conf.auto
nslookup openwrt.org 1.1.1.1
LuCI disconnects after applying changes
That is expected when the management address changes from 192.168.1.1 to 192.168.8.1. Rejoin Pi Wi-Fi and renew the client DHCP lease.
When not to use this path
- Pi must enter PPPoE credentials directly: use PPPoE
- Wired LAN clients are required: add a USB Ethernet adapter or VLAN-capable switch
- Pi is only a plain AP and does not need to route all client traffic: a bridge AP is possible, but it is outside this proxy-gateway path