Raspberry Pi ImmortalWrt Quick Installation Guide
This guide covers the basic ImmortalWrt installation and configuration process for a first deployment.
Acceptance result: LuCI is accessible, devices connected to the Pi Wi-Fi can access the internet, the package manager is identified, and a configuration backup is stored on another device.
| Time | Difficulty | Devices | Recommended network mode |
|---|---|---|---|
| 30–60 minutes | Beginner | Raspberry Pi 4B / 400 / CM4 | Upstream router |
Installation sequence
The installation has six phases:
- Confirm the hardware and network role
- Download and flash the correct image
- Complete first login and security setup
- Make the base network pass its checks
- Install OpenClash and import routing rules
- Create the first backup
Change the base network, DNS, and OpenClash in separate phases. Verify each phase before continuing and inspect the most recent change first when a fault occurs.
Preparation checklist
Prepare the following:
- Raspberry Pi 4B, 400, or CM4
- A dependable SD card of at least 8 GB and a card reader
- A stable 5V power supply
- A computer and Ethernet cable
- An existing router for the upstream-router configuration
- Your ISP PPPoE credentials only if the Pi must dial directly
Data will be overwritten: writing a disk image replaces the existing partition table on the selected card. Confirm the target disk before flashing.
Choose the network role
Select the configuration that matches the network environment:
| Network environment | Configuration | Notes |
|---|---|---|
| An existing router already connects to the internet | Upstream LAN connection | PPPoE credentials are not required |
| The modem is bridged and the Pi must dial directly | PPPoE dial-up | Do not use gateway settings from the upstream-LAN configuration |
| Wired clients also need a Pi LAN port | Add a USB Ethernet adapter or a VLAN-capable switch | A physical interface should not be assigned to both LAN and WAN |
This guide assumes the first path: the existing router keeps handling the internet connection, the Pi Ethernet port becomes WAN, and Wi-Fi remains on LAN.
Download the firmware
- Open the ImmortalWrt Firmware Selector.
- Search for the matching Raspberry Pi model.
- Confirm the target is
bcm27xx / bcm2711; the architecture is commonlyaarch64_cortex-a72. - For a first installation, download a disk image, commonly ending in
.img.gz.

EXT4 or SQUASHFS
| Type | Characteristics | Best for |
|---|---|---|
| SQUASHFS | Read-only system layer plus writable overlay, with factory-reset behavior familiar to OpenWrt users | First installations and easier recovery |
| EXT4 | Directly writable root filesystem and more familiar offline resizing, without the SQUASHFS read-only system layer | Users who have a specific reason to choose EXT4 |
Writing a fresh .img overwrites the target media for both filesystem types. Configuration retention depends on the sysupgrade options and backup process, not only on the EXT4 or SQUASHFS label.
SQUASHFS is recommended for a first deployment. Consult the storage expansion guide when additional space is required.
Flash and complete first boot
The recommended method is balenaEtcher, which can write .img.gz directly:
- Select the downloaded image.
- Select the SD card and confirm its capacity again.
- Start flashing and wait for verification.
- If Windows asks to format a partition afterward, cancel. Windows normally cannot read the Linux partitions.
- Insert the card, connect Ethernet and power, and wait 2–5 minutes.
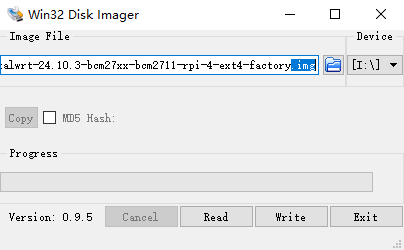
Open the firmware flashing guide for detailed Windows and macOS steps.
Complete first login
Prefer a direct Ethernet connection between the computer and Pi. You may also use the default wireless network when the image provides one; wireless defaults can vary between images, so Ethernet is easier to troubleshoot.
- Open
http://192.168.1.1. - Sign in as
root; check the image notes for the initial password, which may be empty on some images. - Immediately set a strong password under
System -> Administration. - Confirm the timezone and time under
System -> System.
If 192.168.1.1 conflicts with the existing router, disconnect the computer from the upstream network while changing the Pi management address.
First-login acceptance check
- LuCI opens consistently
- You can sign in again after changing the password
- Refreshing the page does not take you to another router
Install packages after all three checks pass.
Configure the base network
Follow the path selected earlier:
- Default: upstream LAN connection
- Direct dial-up: PPPoE
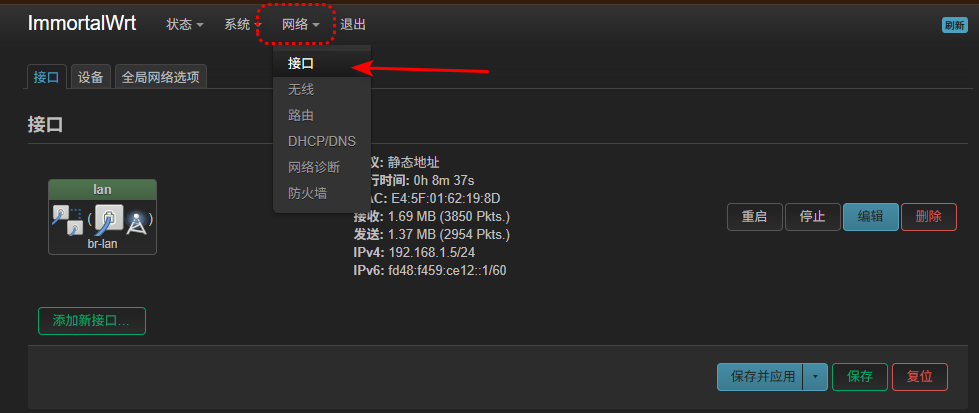
Then run four checks:
ip addr show
ip route show
ping -c 3 1.1.1.1
nslookup openwrt.org
Connect a phone to the Pi Wi-Fi and confirm that it:
- receives an address from the Pi LAN subnet
- can open the LuCI management address
- can open a regular website
If the router can reach the internet but clients cannot, inspect DHCP, the
lan -> wanforwarding path, and the WAN firewall zone. Check DNS first only when raw IP connectivity works but domain lookup does not.
Check your release and package manager
OpenWrt 25.12 and newer use apk; OpenWrt 24.10 and older use opkg. Check before copying commands:
. /etc/openwrt_release
echo "$DISTRIB_RELEASE"
command -v apk || command -v opkg
Use the matching command family:
# OpenWrt 25.12 and newer
apk update
apk add <package-name>

# OpenWrt 24.10 and older
opkg update
opkg install <package-name>
Do not keep retrying opkg on an apk system. Do not blindly mass-upgrade every package with apk upgrade or opkg upgrade; use a coherent firmware upgrade path and create a backup first.
Official reference: OpenWrt package management.
Configure OpenClash
Continue to the OpenClash guide after the base network passes its checks.
The core flow is:
- Install OpenClash using the package path for your release
- Choose a YAML template from this repository
- Replace
这里填写你的订阅链接with your own subscription URL - Import, enable, and verify rule routing
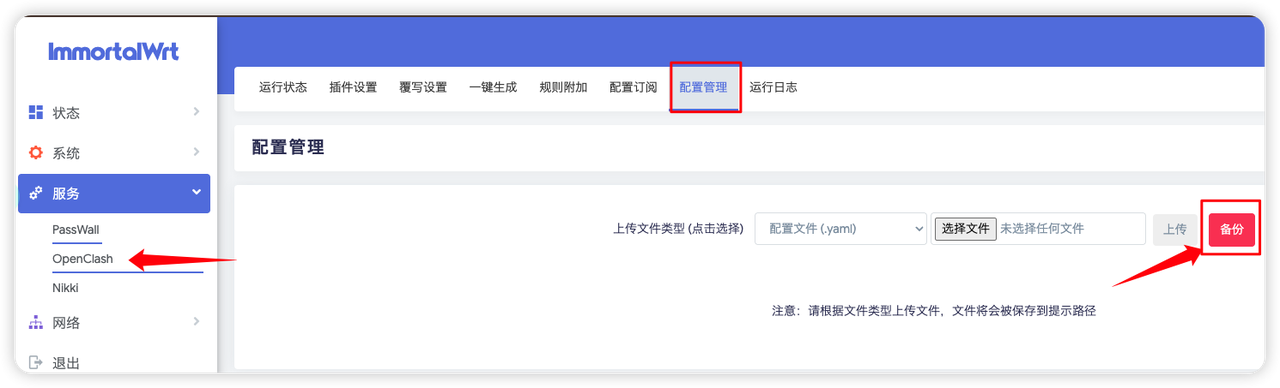
Start with config_linkedin_auto.yaml. Multi-provider users can use config_multi-airport_linkedin.yaml. Use the ssh22_redir variant only when GitHub SSH port 22 is actually blocked.
OpenClash acceptance checks
- OpenClash reports a running state
- Local sites still open
- Sites that require the proxy open
- The base network still works when OpenClash is disabled
Testing with OpenClash disabled distinguishes base-network faults from proxy-configuration faults.
Create the first backup
Go to System -> Backup / Flash Firmware:
- Generate an archive.
- Download the
.tar.gzfile to the computer. - Confirm that it is not empty and include the date in its filename.
- Record the current firmware release and important packages.
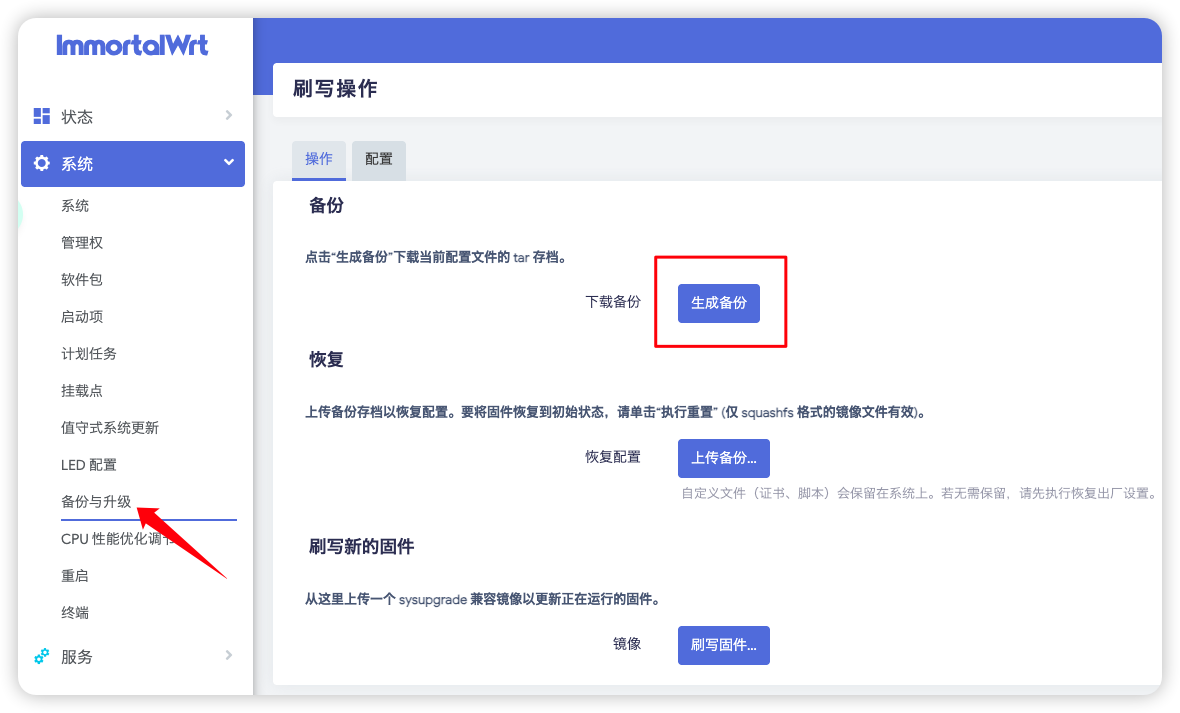
Read backup and restore before relying on the archive for migration.
Troubleshoot by symptom
| Symptom | Check first | Do not touch yet |
|---|---|---|
192.168.1.1 does not open | Computer address, cable, address conflict | OpenClash |
Router cannot ping 1.1.1.1 | WAN address, default route, dial-up state | DNS |
| IP works but domains fail | DNS configuration | Reflashing |
| Router works but clients do not | DHCP, firewall zones, LAN-to-WAN forwarding | Subscription URL |
| Failure appears only with OpenClash enabled | OpenClash logs, profile, DNS mode | Physical WAN connection |
Change one category of settings at a time and repeat the same check afterward.
Acceptance checklist
- LuCI opens and the administrator password has been changed
- The Pi has the correct WAN address and default route
- IP and DNS tests pass on the router
- A client on Pi Wi-Fi can reach the internet
- You know whether the system uses
apkoropkg - You can distinguish base-network state from OpenClash state
- The first backup is stored on another device
Continue to system maintenance when these checks pass.